Making text changes using Beaver Builder
May 17, 2024 | jcullen
Introduction
In this video tutorial, you will learn how to edit text on a WordPress site using Beaver Builder. The tutorial covers logging in, navigating the Beaver Builder interface, and making specific text changes within different modules, with step-by-step guidance on updating and saving modifications.
Prepare to Edit
Prepare to Edit
- Ensure you are on the page where you want to make text changes.
- Confirm that you are logged into your WordPress account by looking for the admin bar at the top of the screen. If not visible, log in.

Access Beaver Builder
Access Beaver Builder
- Hover over the ‘Beaver Builder’ option in the admin bar.
- Click on ‘Page’ from the dropdown menu to enter the Beaver Builder editing environment.

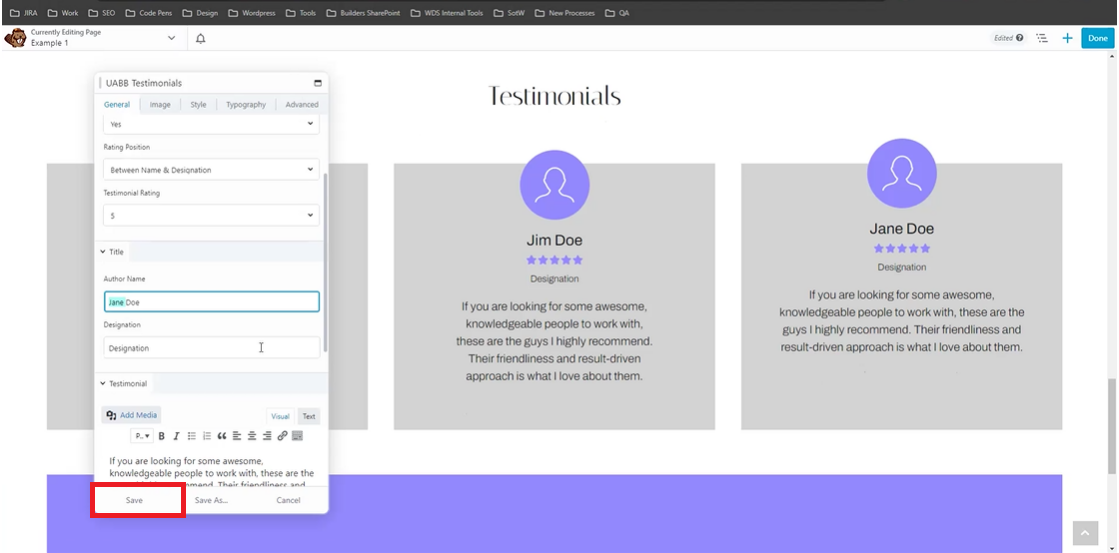
Navigate to Text Module
Navigate to Text Module
- Once Beaver Builder loads, hover over different sections to see the modules.
- Identify the text module where you need to make changes.
Edit Text
Edit Text
- Click into the text area of the text you want to edit.
- Make the necessary text changes by typing directly in the text box.
- Example: Correct typos or update content.

- If unable to edit text directly due to restrictions, you will need to look in the module settings.
- Find the editable text under either the ‘Content’ or ‘General’ tabs within the module settings.
- Note: If you are not able to find the editable text from one of these tabs you may need to review the other module settings tabs.

Save Changes
Save Changes
- After making the necessary text edits, click ‘Save’ to apply changes to the module.
Finalize and Publish
Finalize and Publish
- Once all changes are made, click ‘Done’ and select ‘Publish’ to make the changes live on your website.